Showing posts with label Kitchen Week. Show all posts

Sunday, July 15, 2012

Funfetti Cake


In addition to Kitchen Week, I just had to share this;
Make your own funfetti cake.
And let me tell you, it's delicious!


Things You'll Need:
  • Cake Batter (and everything it calls for)
  • Wonka Nerds candy
  • Icing


Step 1. Once you've mixed your cake batter fully, sprinkle in some nerds candy.
Mix, and add more. Use about 2/3  of nerds here.


Step 2. Pour the cake batter into the pan. Add more nerds if desired (but not all of them).

 Step 3. Bake cake in oven for as long as called for.

 Step 4. Let cool, then add icing, and sprinkle the remaining nerds on top.


Friday, July 13, 2012

FROYO FRIDAY at home // Froyo Popsicles

Instead of adventuring out today, I stayed in and made my own frozen yogurt treat.

As Kitchen Week comes to an end, I present Froyo Popsicles! 


Things You'll Need:
  • Yogurt cups 
  • Popsicle sticks 
  • Knife
  • A Freezer


Step 1. Using a sharp knife, carefully stab in the middle of each yogurt cup.

Step 2. Wiggle the knife back and forth to create a cut line big enough for the popsicle stick to go through.

Step 3. Stick the popsicle stick in.

Step 4. Put the yogurt cups in the freezer for 2 hours, or until frozen.

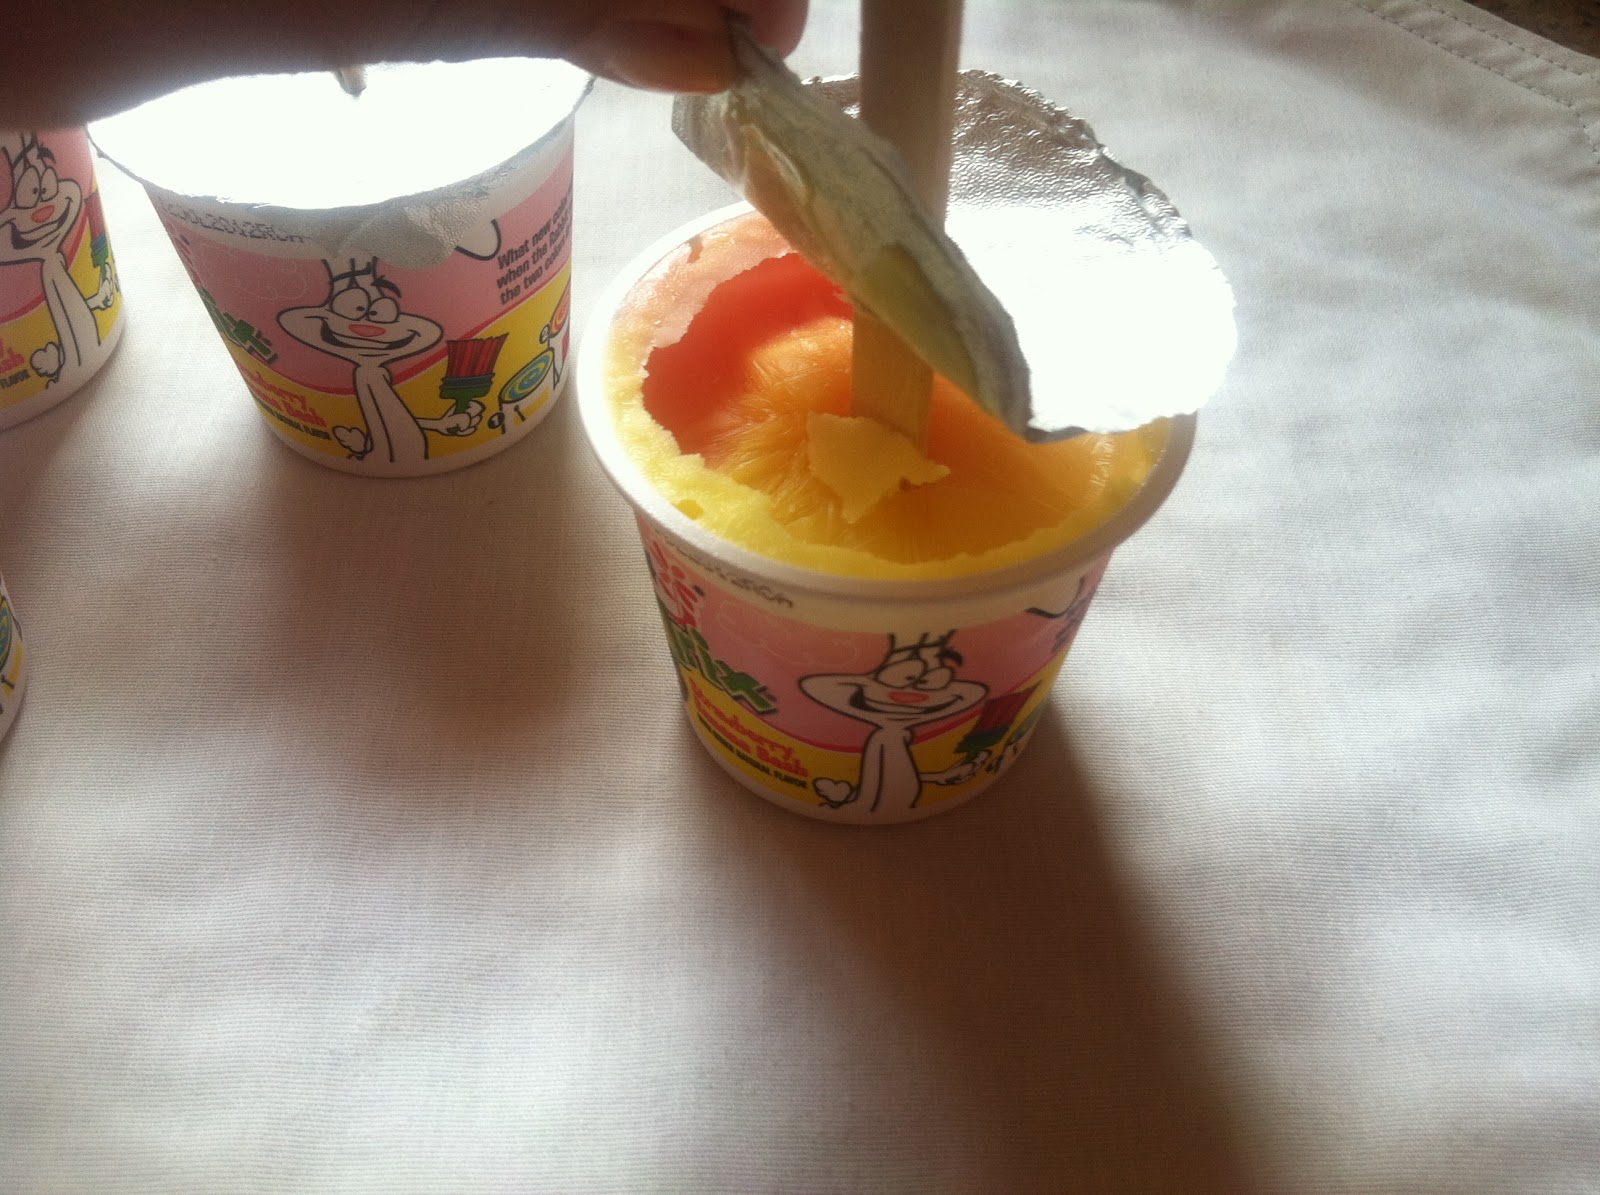
Step 5. Carefully pull the seal off, and around the popsicle stick.

(It'll then look like this)


If you cannot just wiggle the popsicle out, (like I couldn't,) take a knife and carefully wiggle it in enough to separate the yogurt from the cup. It should then come out easily.

Wednesday, July 11, 2012

Zucchini Chips

Kitchen Week continues! Today, I made Zucchini Chips! They're super scrumptious, even for the non-zucchini lover.


Things You'll Need:
  • Zucchini
  • Knife
  • Olive Oil
  • Baking Sheet
  • Salt, Pepper, Garlic (etc.)
  • Oven

Step 1. Preheat oven to 375 degrees.

Step 2. Cut thin slices of zucchini and place them on baking sheet. (You can put wax/parchment paper down first, but it's not necessary.)

Step 3. Add olive oil. Spray-able olive oil is desirable. But in my case, I used liquid, and simply spread it on.

Step 4. Then add your seasoning. I used sea salt & garlic powder, as seen below. 

Step 5. Put in oven for 12 minutes, or until crispy.

Step 6. Let cool for 3 minutes before eating.

Tuesday, July 10, 2012

Marshmallow Time Saver Frosting

Day 3 of Kitchen Week!
Today I've made Marshmallow Frosting, a total time saver!


Step 1. Put your cake batter in the oven for five minutes less than called for.

Step 2.  Take it out of the oven, and place marshmallow(s) on top.
For the traditional cupcake, one marshmallow will be enough.

Step 3. Put it back in the oven for five minutes.

Step 4. When you take it out, wait for the melted marshmallow creme to cool before removing from pan.

Monday, July 9, 2012

'Lazy' Grilled Cheese Sandwich

Day Two of Kitchen Week!
I call this one "'lazy' grilled cheese sandwich" because it doesn't require grilling, yet it tastes the same in half the time!

Things You'll Need:
  • Bread
  • Cheese
  • Cheese grater
  • Toaster
  • Microwave


 Step 1. Put two pieces of bread in the toaster.

 Step 2. Grate cheese onto one slice of the bread; make sure you have enough cheese to cover the bread in at least two layers.

 (It'll look like this.)

 Step 3. Put the other piece of bread on top.

Step 4. Put sandwich in microwave for 30 seconds.


Sunday, July 8, 2012

S'mores Marshmallow Pops

Today kicks off Kitchen Week, here on daile lele!
First up, we have one of my all time favorites; S'mores Marshmallow Pops!

Things You'll Need:
  • Marshmallows
  • Graham crackers
  • Chocolate sauce
  • Skewer sticks
  • 2 bowls (microwave safe)


 Step 1. Over a bowl, crush up some graham crackers into crumbs. You don't need to use a lot of graham crackers. (Half a graham cracker made me at least 6 s'mores pops.)


Step 2. Place each marshmallow on a skewer stick.

Step 3. Heat up your chocolate sauce. (I used Duncan Hines microwave and pour desert topping, as seen below.) You could also simply melt chocolate bars using a double burner.

 Step 4. Hold the marshmallow on a stick over a microwave safe bowl, and pour your chocolate sauce on. Make sure the marshmallow is covered with chocolate. You can also dip the marshmallow in bowl to use up all the chocolate. (If the chocolate sauce hardens, put the bowl back in the microwave for 10-15 seconds)


 Step 5. Sprinkle the graham cracker crumbs on the chocolate covered marshmallow before the chocolate sauce cools.
(Make sure you get graham crackers on the top of each pop!)

Step 6. Put the skewers in a cup, so that the marshmallow pop can cool down and dry before you eat it.